Not aware of how to move from Shopify to WooCommerce? Read on to know all the details about the same with all the important insights.
How to Move from Shopify to WooCommerce: Step-by-Step Guide
Launching your first online store with Shopify is a fantastic choice. It’s user-friendly, reliable, and packed with features that make it easy for beginners to start selling. However, as your business expands, you might start encountering some of the limitations inherent in this hosted platform. If you’re starting to feel constrained by Shopify, transitioning to WooCommerce development services could be the solution you need.
WooCommerce offers unparalleled flexibility and control over your e-commerce site. With WooCommerce, you can customise every aspect of your store, from tax configurations to bespoke shipping options. Plus, you can list an unlimited number of products without incurring additional costs.
This guide will cover everything you need to know about migrating from Shopify to WooCommerce. We’ll outline the necessary preparations and provide a detailed, step-by-step process to ensure a smooth transition. Let’s dive in and get started!
Migration from Shopify to WooCommerce: Explained in Steps
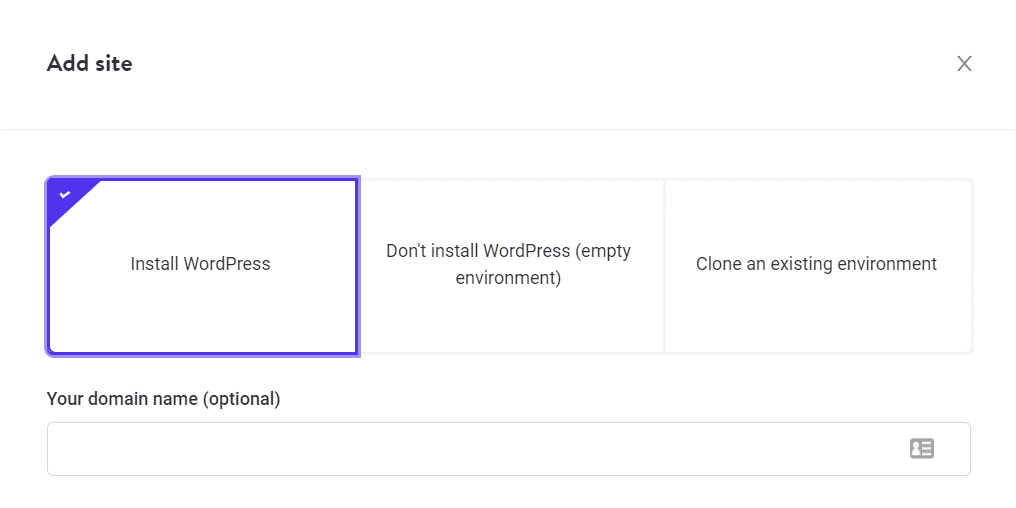
Step 1: Set Up WordPress
WordPress provides multiple installation methods tailored to different types of web hosting services. For instance, managed WordPress hosts typically handle the CMS setup automatically when you create a new website. This convenience allows you to focus on building your site without worrying about the technical details of the installation process.
 If your web host doesn’t provide automatic WordPress installation, you should explore your hosting control panel. Often, you’ll find a software installer like Softaculous, which allows you to set up WordPress quickly and easily.
Another option is to download and install WordPress manually. This process is simpler than you might expect. You can download the software from WordPress.org, and then use the well-known ‘five-minute’ installer, which guides you step-by-step once you’ve uploaded the necessary files to your server.
Step 2: Install WooCommerce
After installing WordPress, you’ll be able to access the dashboard. This central hub offers full control over your website’s settings, layout, and the content you publish. From the dashboard, you can customise your site’s appearance, install and manage plugins, create and organise posts and pages, and much more.
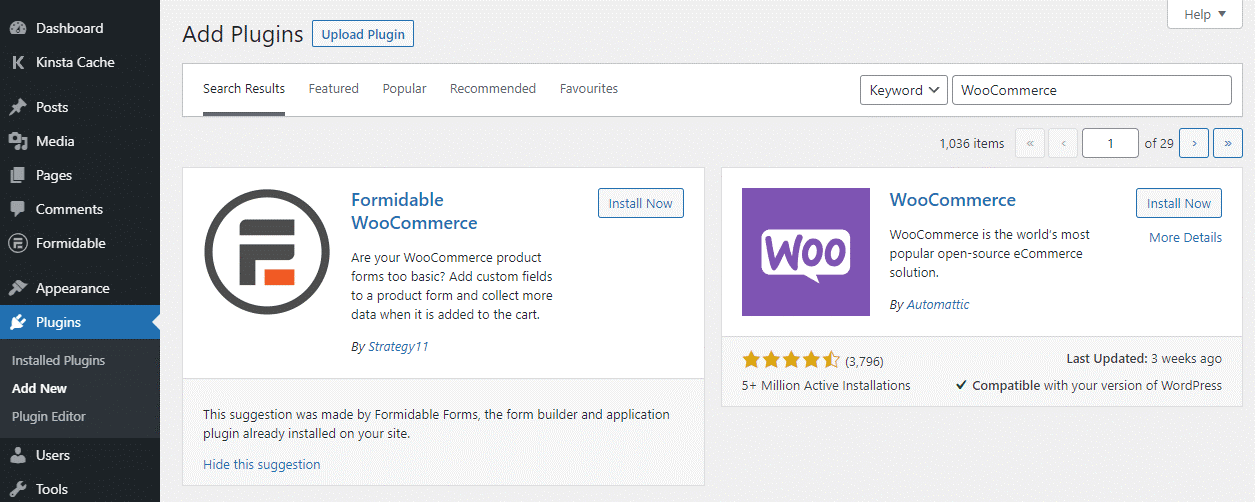
 To transition your website into an online store, your first step is to install WooCommerce. Navigate to Plugins > Add New, then enter “WooCommerce” in the search bar at the top of the screen.
WooCommerce will appear among the top search results.
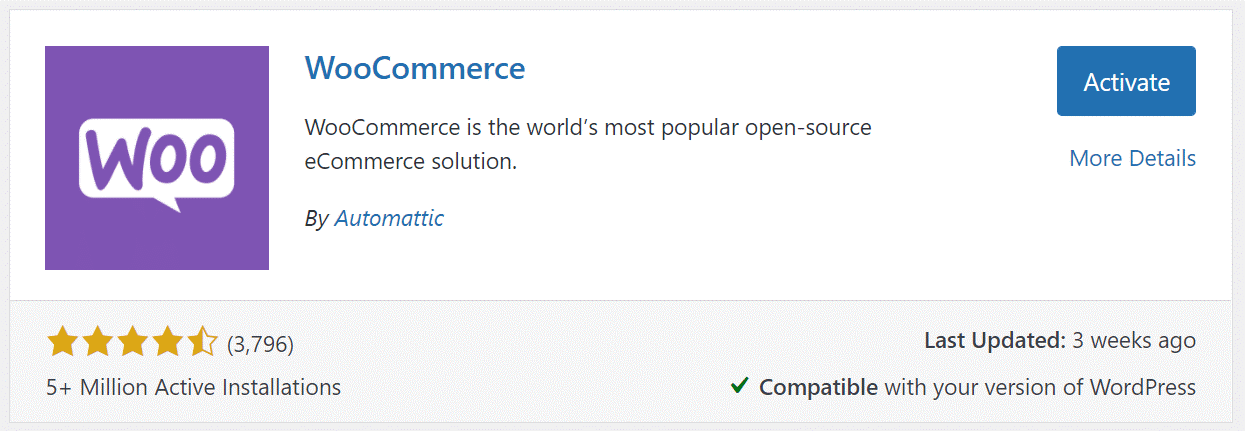
 Click the “Install Now” button next to the WooCommerce option. WordPress will then download and install the plugin in the background. Stay on the page until the “Activate” button appears next to WooCommerce. Once it does, click on “Activate” to enable the plugin and start setting up your online store.
 That’s it! WooCommerce is now up and running, allowing you to start publishing and selling products. Since you already have a complete product catalogue on Shopify, the next step is to transfer your existing products to WooCommerce. This ensures a seamless transition and allows you to continue managing your inventory without starting from scratch.
Step 3: Import Shopify Products to WooCommerce
As previously noted, Shopify allows you to export your entire product catalogue in CSV format. This file contains essential details such as titles, slugs, tags, variants, and prices for the products you wish to migrate.
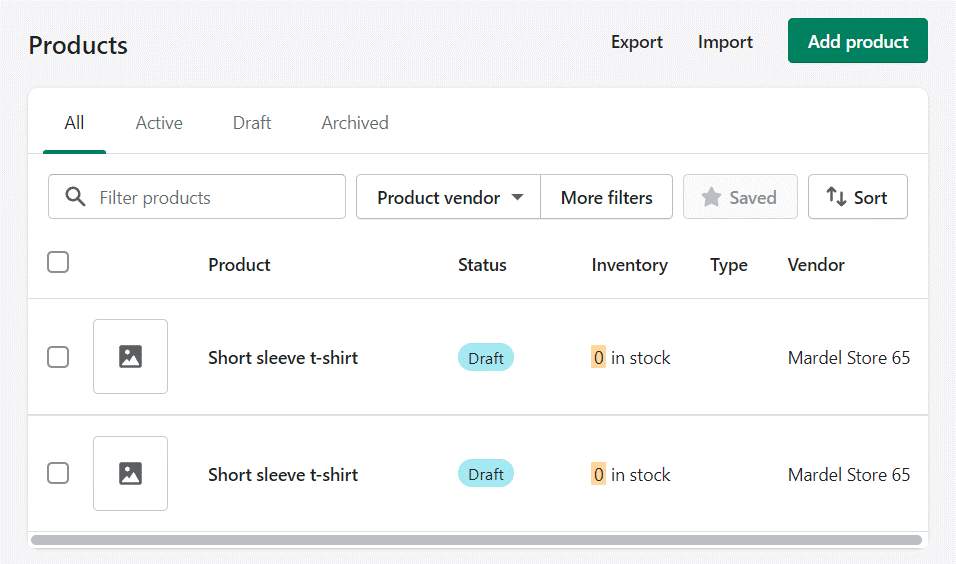
To export your Shopify product data, log in to your account and go to Products > All Products. This page will display a comprehensive list of all the products in your store, along with options to import and export data. Click on the export option to download your product catalogue as a CSV file.
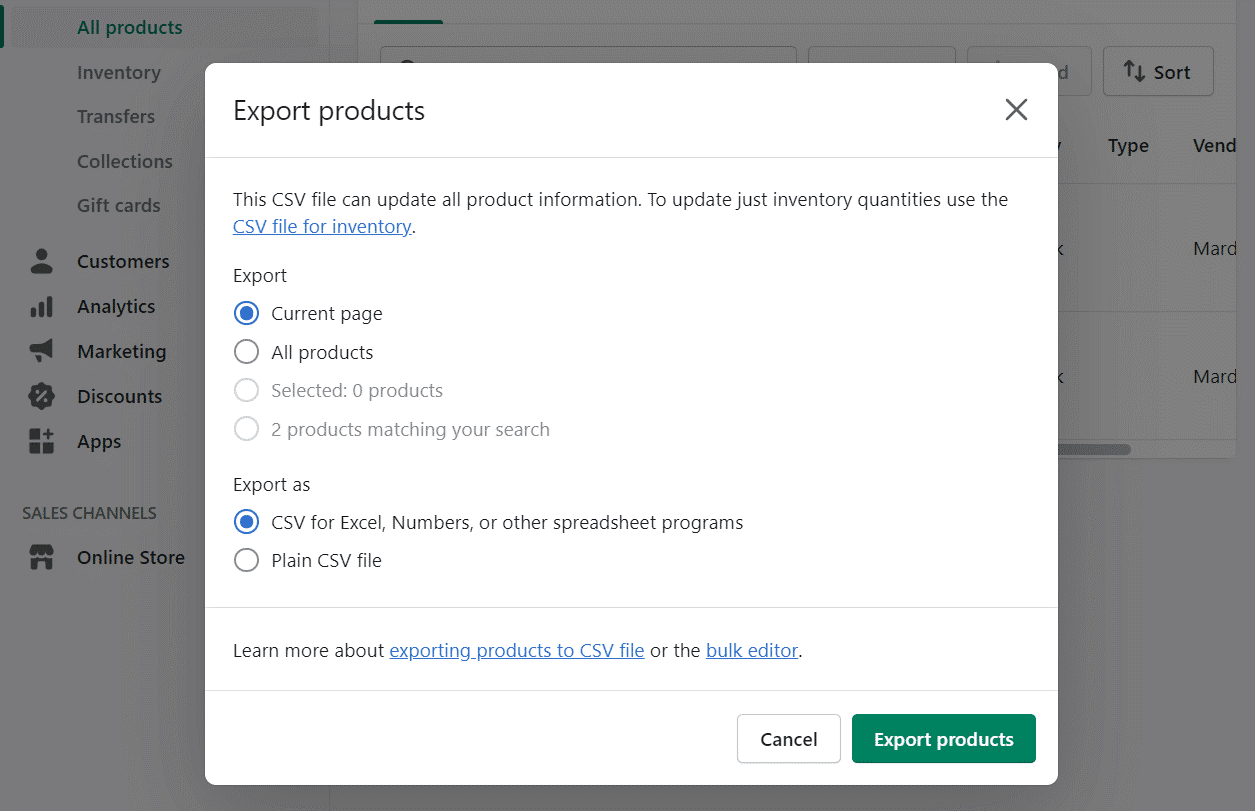
 Click the “Export” button at the top of the screen. Shopify will prompt you to choose which products you want to export. Select “All products,” then choose the “CSV for Excel, Numbers, or other spreadsheet programs” option under “Export as.” This ensures compatibility with various spreadsheet programs for easy manipulation and transfer of your product data.
 After clicking on “Export products,” Shopify will compile a CSV file containing all your product data and send it to you via email. The time it takes for the email to arrive may vary based on the size of your inventory, so be patient while Shopify processes your request.
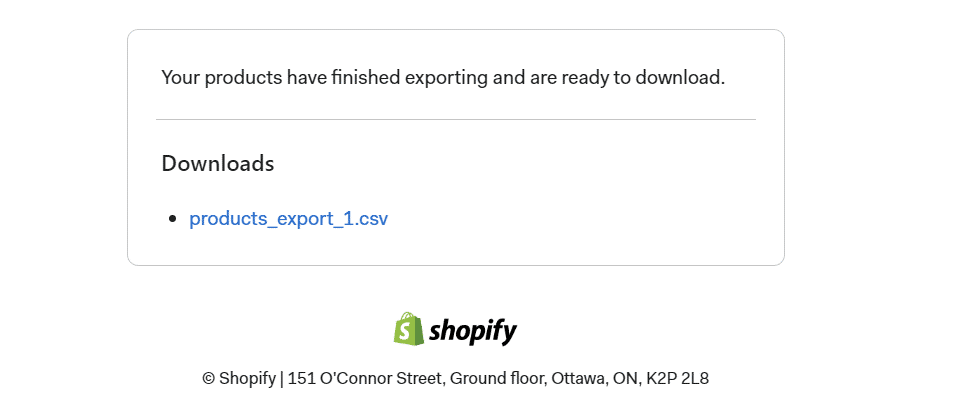 The email from Shopify will contain a link to download the CSV file containing all your product information. Be sure to save this file to your computer, as you’ll need it for the next step in the migration process.
Step 4: Customise Your WooCommerce Store
Now that you have successfully migrated the products, it’s time to perform the following tasks:
- Choosing template for website
Thee are thousands of WordPress themes that you can choose from for your website. These themes will help to outshine your website. These themes have easy-to-use customisation options and therefore they are easy to install.
- Designing landing pages
For many eCommerce store owners, the ability to create custom landing pages is crucial. Whether you’re looking to design a unique login or checkout page, WooCommerce offers the flexibility you need.
With WooCommerce and assistance from WooCommerce development company, you can effortlessly create custom landing pages using simple drag-and-drop WooCommerce blocks. This feature allows you to design your product pages exactly how you envision them, providing a seamless and personalised shopping experience for your customers.
- Improve eCommerce SEO
Search engines are a vital source of traffic for eCommerce websites. Enhancing your site’s SEO can significantly increase free organic traffic, fuelling the growth of your business.
One of the most effective ways to boost your SEO is by installing and activating the All in One SEO for WordPress plugin. This powerful tool is regarded as the best WordPress SEO plugin, offering straightforward optimisation for WooCommerce without requiring specialised skills.
- Setting up conversion tracking
If you’re eager to understand your customers’ behaviour and track their interactions on your site, MonsterInsights is the ideal tool for you. This plugin simplifies WooCommerce user tracking and offers comprehensive eCommerce statistics, providing invaluable insights into your store’s performance.
Step 5: Setting Up Redirects to New WooCommerce Site
With your WooCommerce shop fully configured, the final step is to establish the appropriate redirects from Shopify to WooCommerce. Redirects ensure that search engines and visitors are automatically directed from your old Shopify site to your new WooCommerce store, preventing any loss of customers who land on the wrong website.
If your store previously used a Shopify branded domain name (e.g., yourstore.myshopify.com), setting up individual redirects is not possible. An easy workaround is to add a link to your new store on your Shopify website. This directs visitors to the correct location, ensuring a seamless transition from Shopify to WooCommerce.
Moving domain from Shopify to WooCommerce
If your Shopify site utilised a custom domain name, you can redirect it to your new WooCommerce store by adjusting your domain’s DNS settings. Your new hosting provider will furnish you with the necessary DNS server addresses, which you will need to input into your domain settings. This process enables seamless redirection from your old Shopify site to your new WooCommerce store, ensuring continuity for your visitors.
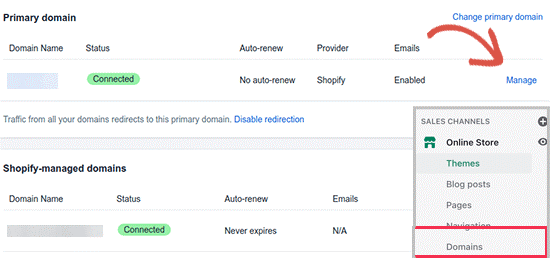
In case your domain is registered via Shopify, it is easier to log in to your account and go to Online Store » Domains to manage your DNS settings.
 Updating URL in WooCommerce
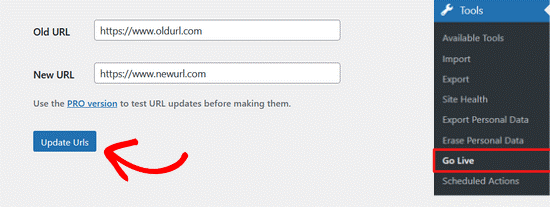
To update URLs in your product descriptions that still point to your old Shopify branded domain, you can use the Go Live Update Urls plugin. This plugin allows you to easily update all URLs in bulk, rather than manually searching for and updating them one by one.
The easiest way is to install and activate the “Go Live Update URLs” plugins. After activation, the next step to perform is Tools > Go Live page. It’s now time to enter Shopify store URL both new and old.
 Setting up redirects for individual pages
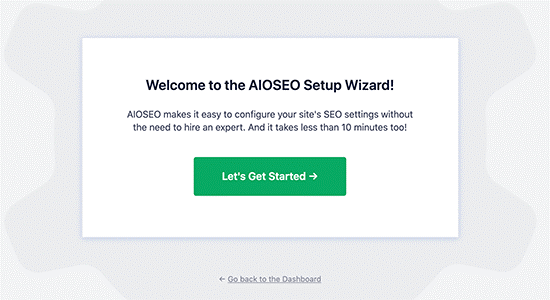
This step ensures you are redirecting your visitors and search engines to the right blog posts and pages. For the same, you need to activate and install All in One SEO for WordPress plugin. After activation, you will have the following screen.
 After that, you need to go to the All in One SEO » Redirects page to set up redirects.
Here, you can enter the old URL in the ‘Source URL’ field and enter the new URL of the page/post in the ‘Target URL’ field.
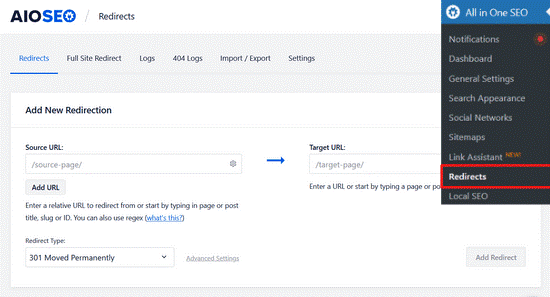 It is important to ensure that the redirect type is “301 Moved Permanently” and then click on the add redirect button. This process can be repeated for redirecting other links.
That’s all about moving from Shopify to WooCommerce!
NOTE: If you want reliable assistance for similar service, choose a trusted WordPress development company for additional benefits.